How to setup Truenas on your Dell Server: Step by Step
TrueNAS is a powerful, open-source storage operating system built on FreeBSD. It allows you to transform your existing hardware into a robust, reliable Network-Attached Storage (NAS) solution for managing and securing data. With advanced features like data encryption, replication, and snapshotting, TrueNAS is perfect for home labs, small businesses, and enterprise environments.
In this guide, we’ll walk you through the process of setting up TrueNAS on a Dell server. This method is tailored to Dell servers, but it may work on other systems as well, though results can vary.
Step 1- Download Truenas OS.
To get started, download the TrueNAS Core ISO image. You can do this by visiting the official TrueNAS website. Download TrueNAS Core
Step 2- Download Rufus
Rufus is a free, open-source tool that helps you create bootable USB drives. It’s quick, reliable, and commonly used for creating bootable media to install operating systems.
To download Rufus, go to:.
To download Rufus, simply visit the official website at: Rufus Download
Step 3- Write the OS to your drive

Once you’ve downloaded both TrueNAS and Rufus, you can now create your bootable USB.
- Plug your USB drive into your computer.
- Open Rufus and select your USB drive under “Device.”
- Under “Boot selection,” choose Disk or ISO image (Please select) and browse for the TrueNAS ISO you downloaded.
- Configure the following settings:
- Partition Scheme: GPT
- Target System: UEFI
- File System: FAT32
- Cluster Size: Default
4. Selecting your bootable media
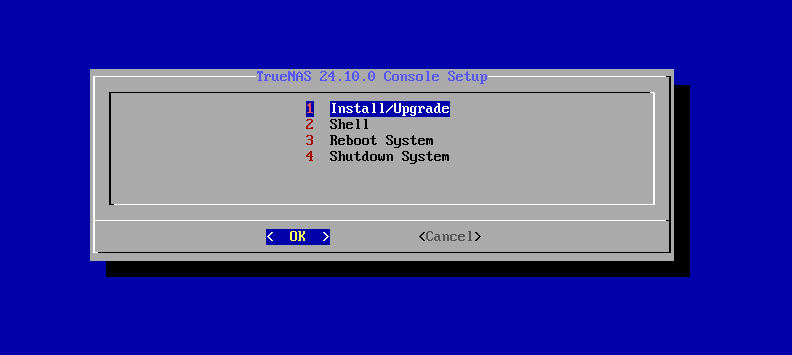
Once the drive is confirmed to have been written to, plug it into the back of your server. Boot your server like normal and if your using a Dell server, this screen should appear.

- Plug the bootable USB into the back of your Dell server.
- Power on or restart the server, then press F11 to enter the Boot Manager.
- Note: F11 is specific to Dell servers; it may be different on other systems. You’ll see a message saying, “Entering Boot Manager.”
- In the Boot Manager, select the One-Time Boot Menu. You should see the USB drive listed as an option. If you don’t see it, reboot and try again from Step 2.
- Select the USB drive and proceed with the boot.

Step 5- Truenas Installation
After the server boots up from the USB, you’ll be prompted with a few options. Choose the first option: “TrueNAS Install” (not the baud-rate option).
The installation interface will appear. Follow these steps:
- Select the drive where you want to install TrueNAS (make sure the drive has no existing data).
- Confirm and start the installation.
Select the first option, and it will prompt you to select a drive to install to, this will be your bootable drive, so ensure there is no data already on it.
Step 6: Access TrueNAS Web Interface
Once TrueNAS has been successfully installed, you’ll be given an IP address for accessing the web interface. It will look something like this:
- Example:
http://10.0.0.51
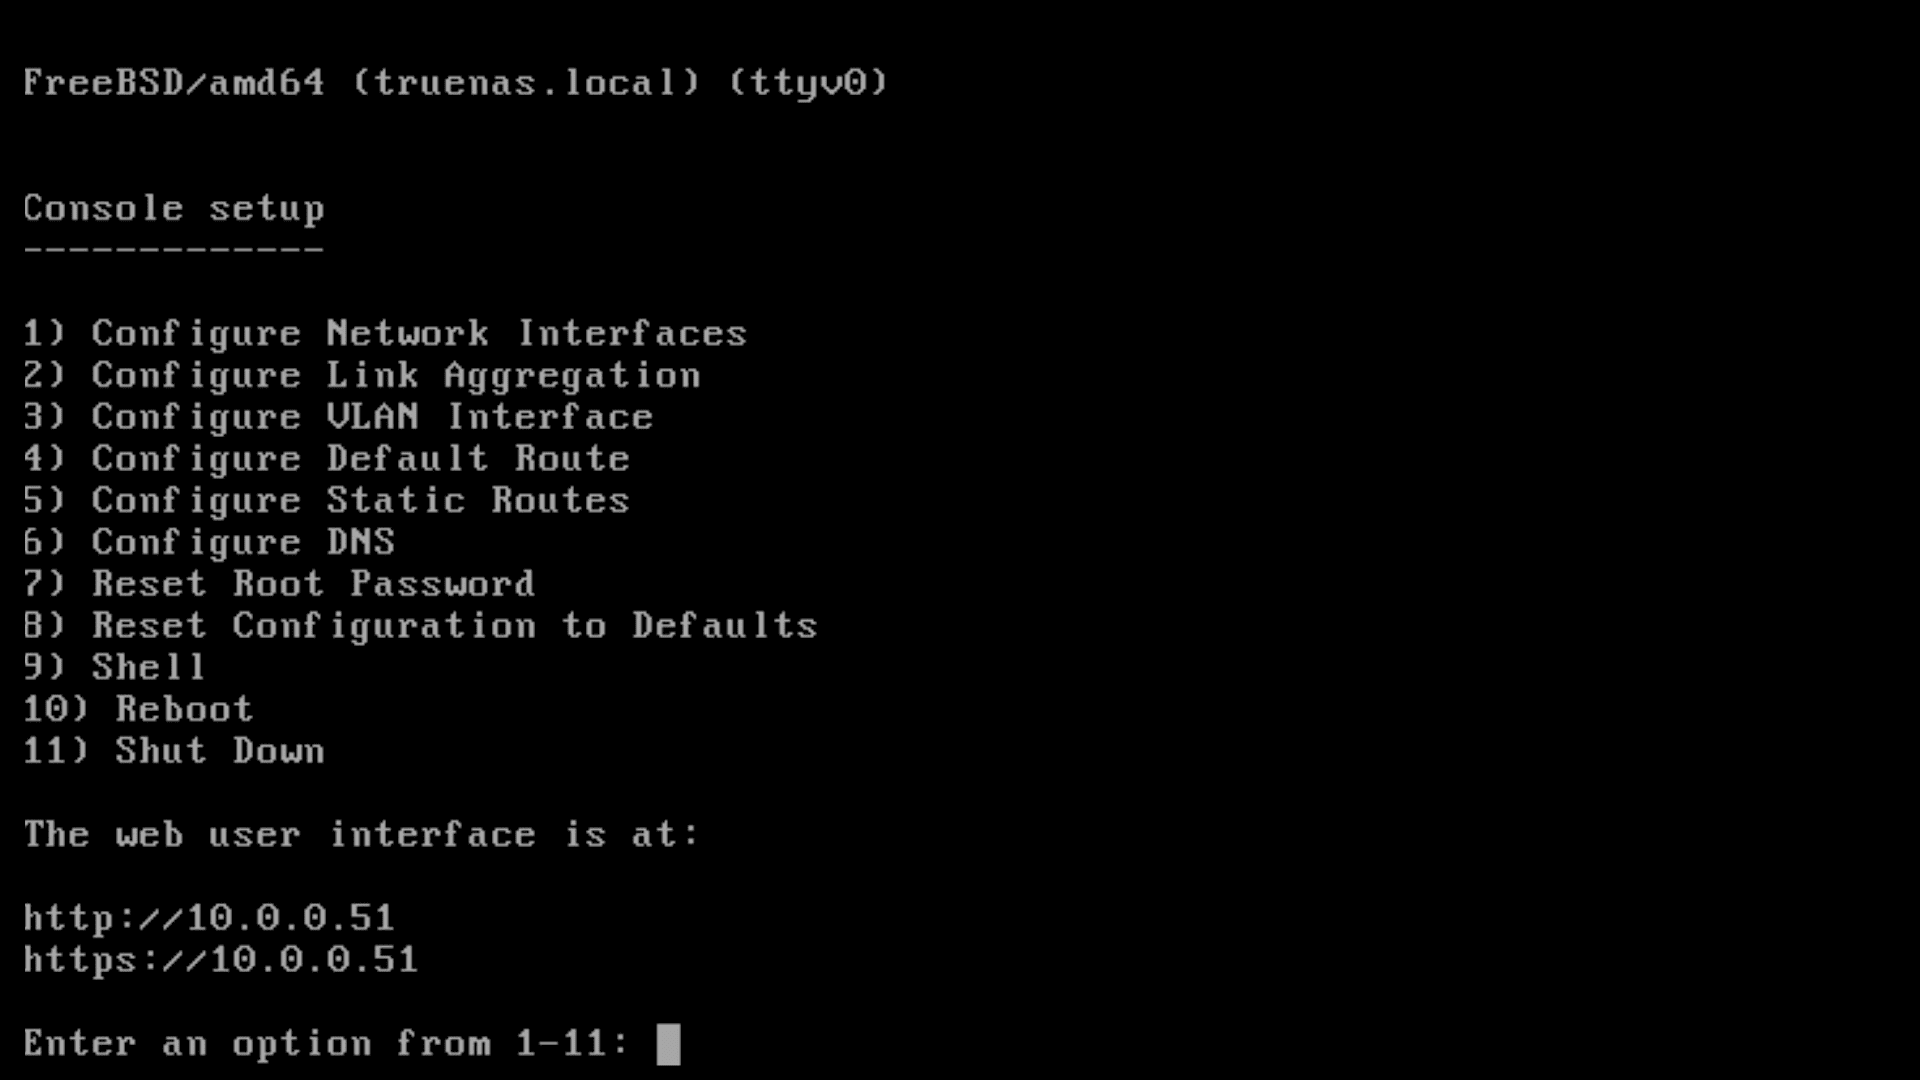
To access it:
Open a web browser on your PC and type in the IP address (ensure your server is connected to the network).
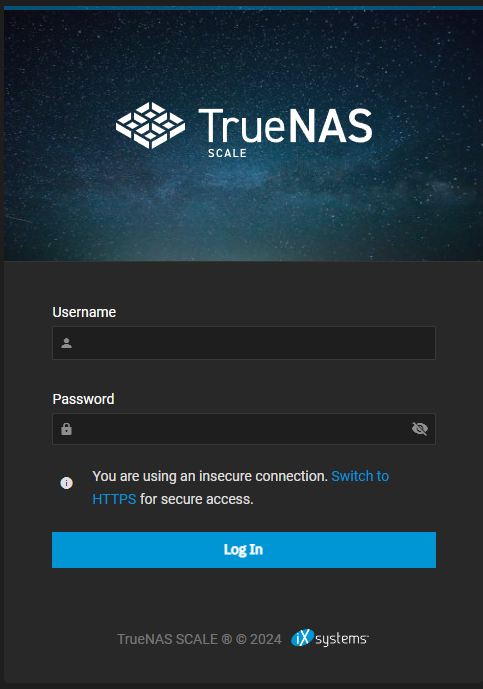
If you see a prompt to log in:
- Username:
truenas_admin - Password: The one you set during installation (or default, depending on your setup).
- Username:
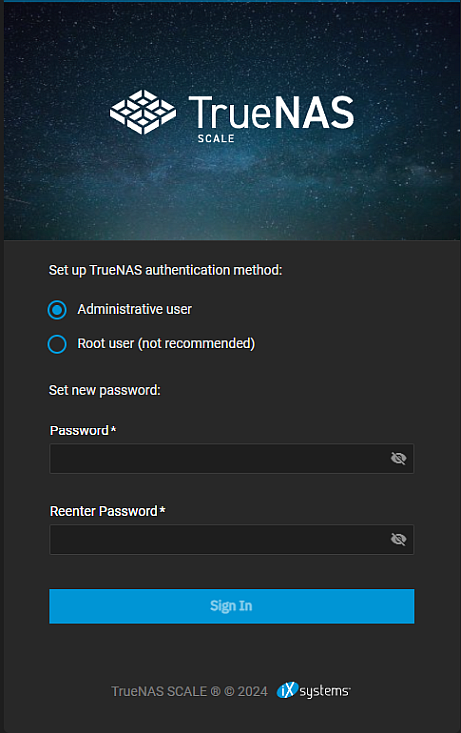
If you’re prompted to create a password:
Set a password for the
truenas_adminuser.Log in with the username truenas_admin and the password you just created.
Final Thoughts
Congratulations! You now have a fully functioning TrueNAS system running on your Dell server. From here, you can set up storage volumes, configure network shares, and manage your data securely. To ensure the best connection, we recommend using an Ethernet cable for the server’s network connection, as it will provide faster and more reliable access to the TrueNAS Web UI.