Arduino is one of the most popular platforms for electronics and programming enthusiasts. Whether you’re a beginner or an experienced developer, Arduino offers endless possibilities for creating projects ranging from simple LED blinkers to complex automation systems. In this guide, we’ll cover what Arduino is, how to get started, and some exciting projects you can build.
What is Arduino?
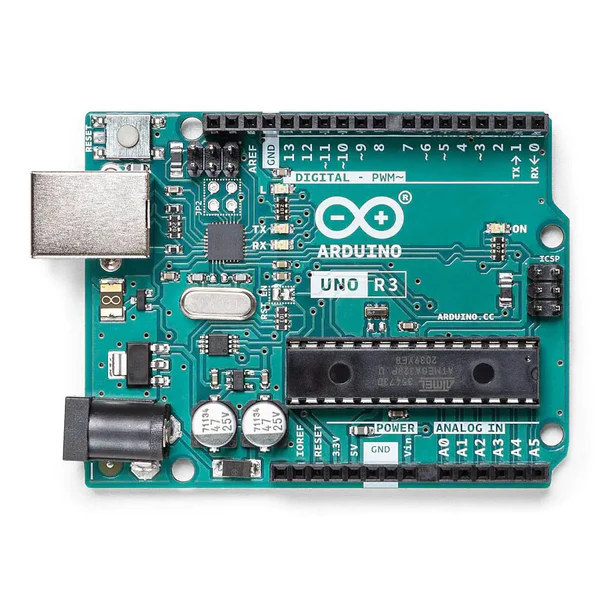
Arduino is an open-source electronics platform based on easy-to-use hardware and software. It consists of microcontroller boards that can read inputs from sensors and control outputs like LEDs, motors, and displays. Because of its flexibility and affordability, Arduino is widely used in hobby projects, prototyping, and even commercial applications. There are different types of Arduino boards such as the UNO, Nano, micro and many more.
Why Use Arduino?
- Beginner-Friendly – Since Arduino’s coding language is based on C/C++, it has been simplified for ease of use.
- Affordable – The boards and components are inexpensive and widely available, making them accessible to everyone.
- Large Community – A vast online community provides tutorials, forums, and support, ensuring help is always available.
- Versatile – You can use Arduino for robotics, home automation, IoT, and more. Consequently, it has become a go-to platform for DIY electronics.
Essential Components to Get Started
To begin working with Arduino, you’ll need:
- An Arduino board (such as Arduino Uno, Mega, or Nano)
- A USB cable for programming the board
- An LED and resistor for basic experiments
- Sensors like temperature, motion, or ultrasonic sensors, which help Arduino interact with the environment
- Actuators such as servos or motors, which bring movement to your projects
- A breadboard and jumper wires for prototyping, making circuit connections simpler
Setting Up Your First Arduino Project
- Install the Arduino IDE – First, download and install the Arduino Integrated Development Environment from Arduino’s official website.
- Connect the Board – Next, use a USB cable to connect your Arduino to your computer.
- Write a Simple Sketch – Open the Arduino IDE and write your first program (called a “sketch”). The classic example is the Blink program:
void setup() {
  pinMode(13, OUTPUT); // Set pin 13 as an output
}

void loop() {
  digitalWrite(13, HIGH); // Turn the LED on
  delay(1000);            // Wait for a second
  digitalWrite(13, LOW);  // Turn the LED off
  delay(1000);            // Wait for a second
}- Upload the Code – Click the upload button in the Arduino IDE to send the code to your board. After that, the program will start running immediately.
- Observe the Results – If everything is correct, the onboard LED (on pin 13) will blink on and off every second. This simple example demonstrates how Arduino controls outputs.
Exciting Arduino Projects to Try
Once you get comfortable, here are some cool projects you can build:
- Automated Plant Watering System – This project uses soil moisture sensors and a pump to ensure plants get the right amount of water.
- Smart Home Automation – Sensors allow you to control lights and appliances efficiently.
- Weather Station – Collects data such as temperature, humidity, and atmospheric pressure to monitor climate conditions.
- Obstacle-Avoiding Robot – Uses ultrasonic sensors and motors to navigate without hitting objects.
- DIY Security System – Motion sensors and buzzers help alert you to potential intrusions.
Conclusion
Arduino is an excellent platform to dive into electronics and programming. With consistent practice, you can create practical and fun projects that bring your ideas to life. Whether you’re interested in IoT, robotics, or simple DIY electronics, Arduino has something for everyone. So, start experimenting today and unlock the endless possibilities of Arduino!